Balayage stretches salon visits to every 3–4 months, while traditional foil highlights need a touch-up every 6–8 weeks.
The condition is the look you want: foils trap heat and lift brighter, with higher contrast, but they grow out with a visible line. Babylights, sections thinner than sewing thread, refresh every 8–12 weeks.
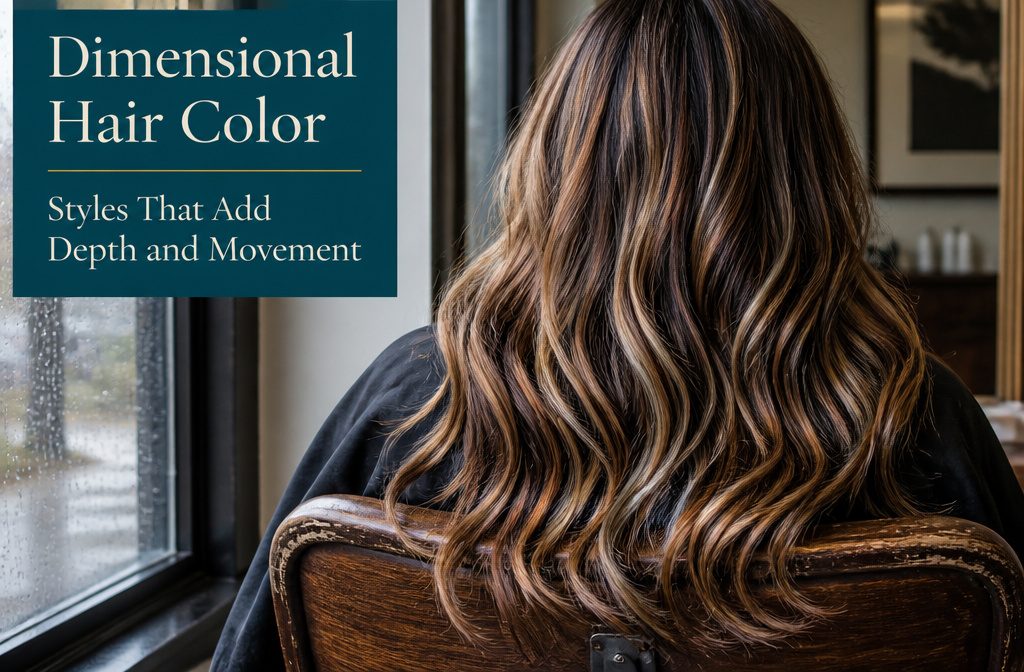
What Dimensional Hair Color Means and Why It Works
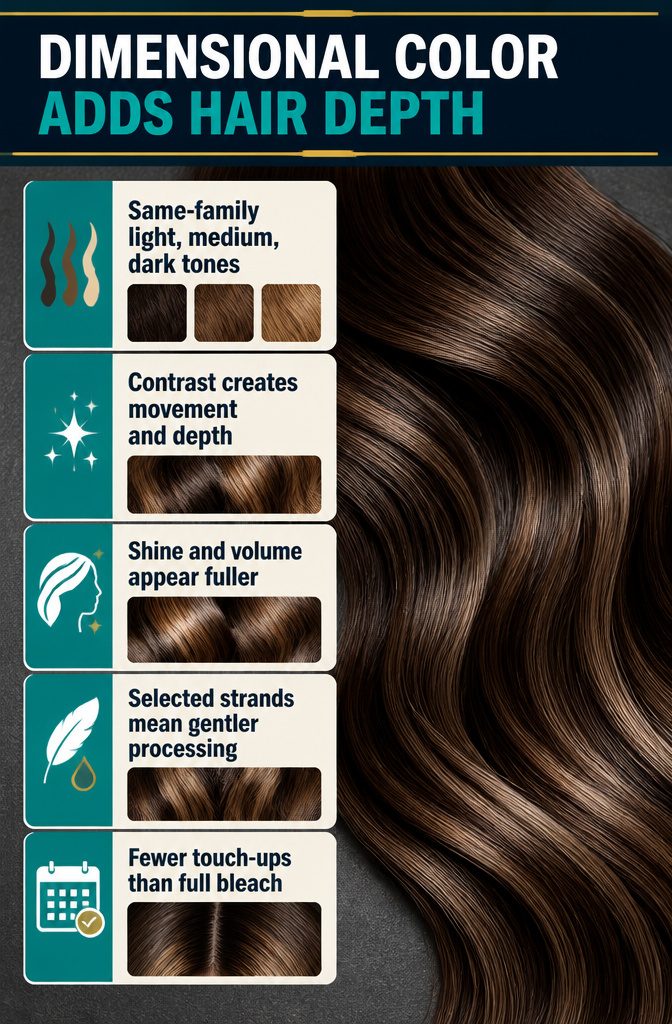
Dimensional hair color means blending multiple tones within the same color family to create contrast between light, medium, and dark shades. Instead of flat, single-process color, you get variation that mimics how natural hair catches and reflects light.
The mix creates movement, depth, and a multi-tonal effect that reads as richer and more natural than one uniform shade from root to tip.
The result is visual. Hair with tonal variation looks like it has more volume and shine, even when the actual texture and density haven’t changed.
The contrast between darker roots or base tones and lighter pieces mid-shaft and at the ends creates what one colorist calls a lamination effect, especially striking on brunettes.
Fine or damaged hair benefits because the technique is gentler than full bleach and requires fewer touch-ups, and the added depth makes thinner hair look fuller without adding product or weight.
1. Balayage
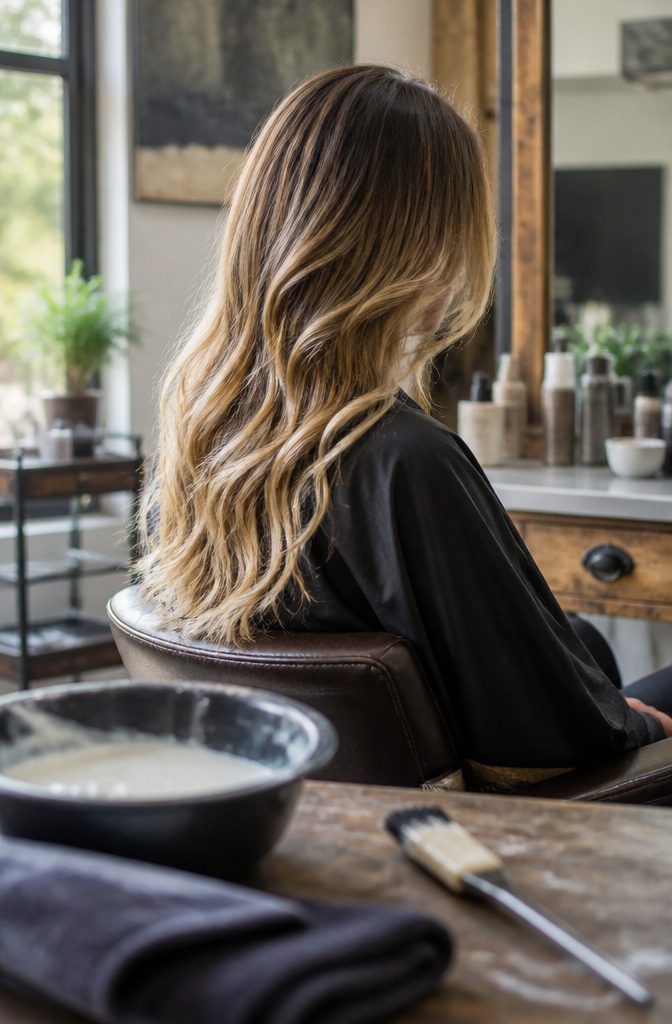
Balayage is lightener painted on freehand, with no foils or caps, so the color fades from darker roots into lighter ends instead of starting at a hard line.
That is why regrowth reads as soft rather than striped. Traditional highlights need a visit every six to eight weeks, while balayage stretches that to every 3–4 months, and some stylists say you can go as long as six.
I’d book at 3–4 months if you want it looking freshest, and push toward six only if you like a grown-out look. Soft blondes, rich chocolates and reds all work, on anything from a short bob to long waves.
2. Traditional or Foil Highlights
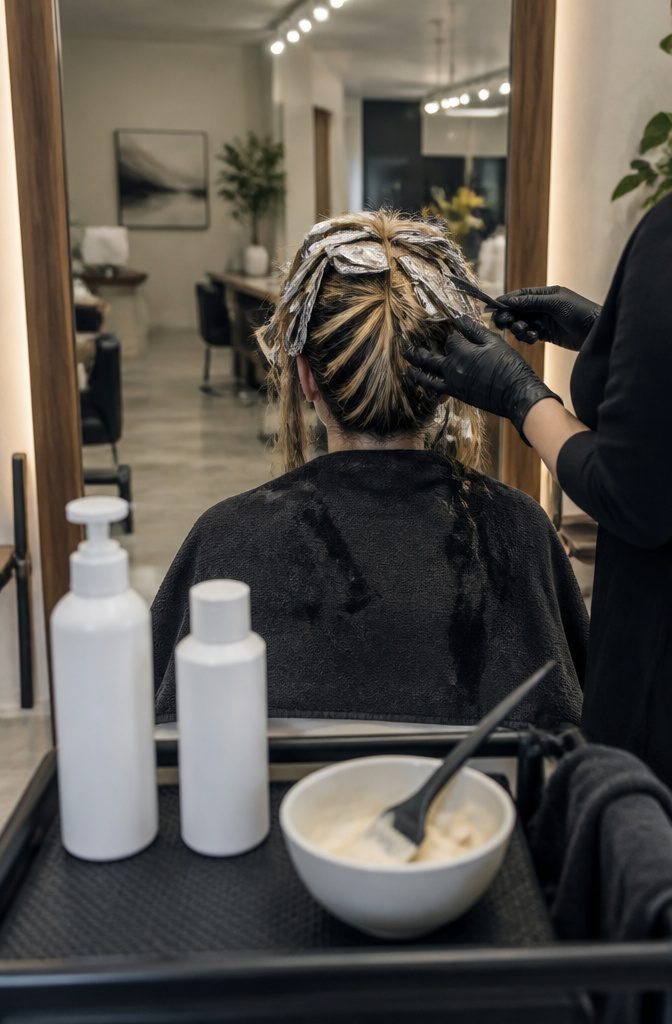
Foils create brighter, more controlled dimension than most other techniques because the hair is sealed inside, trapping heat and letting the lightener lift more dramatically.
The result is higher contrast between light and dark tones, which makes the effect noticeable even from across a room. If you want a polished, sun-kissed look with real punch, foil highlights deliver that better than anything else.
Placement shapes what the color actually does for you. Face-framing highlights brighten your complexion and pull the eye forward.
Crown highlights catch light when you move, adding dimension from above. Nape lowlights tucked underneath create depth and contrast, which keeps the overall result from looking flat or one-note.
The downside is maintenance.
Foil highlights grow out more visibly than softer techniques, so expect touch-ups every 6–8 weeks. Use a sulfate-free shampoo and a weekly mask to keep the lightened sections from turning brittle or brassy between appointments.
3. Lowlights
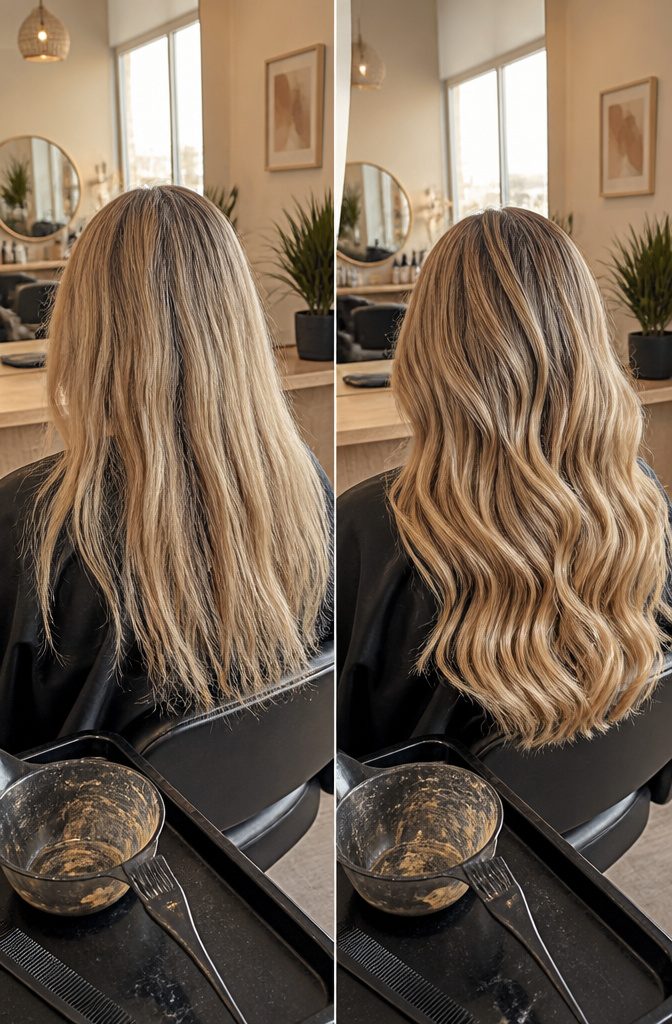
Lowlights are about adding darker pieces back into the hair to create depth and contrast, especially in lighter hair where flat tone can make the whole thing look one-dimensional.
They’re what make blonde or brunette hair look more expensive and multidimensional. The darker shades enhance the lighter pieces, making them stand out instead of blending into a single flat color.
For blonde clients especially, adding caramel or honey lowlights can turn brassy, flat color into dimensional, expensive-looking hair. The technique works by weaving in deeper tones that bring balance and richness without a drastic change.
Lowlights grow out subtly, so you can often stretch appointments to 10–12 weeks between touch-ups. They add texture and variation, ideal for naturally lighter hair that needs more depth.
4. Babylights
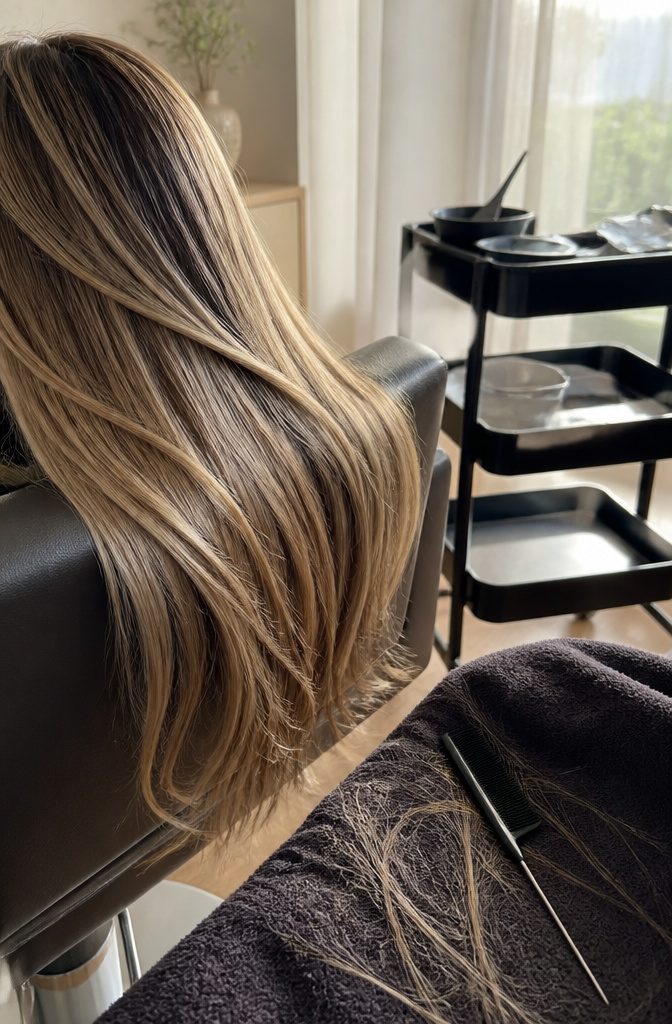
Babylights deliver dimension through sections thinner than a piece of sewing thread, each one so fine that the result reads as natural brightness rather than obvious streaks.
The technique mimics the sun-touched highlights you had as a kid, which is where the name comes from.
Stylists often tease the hair first so only a limited amount of strands take color, keeping the effect subtle and the regrowth nearly invisible.
I’d point fine-haired clients here first. Heavy processing shows fast on thin hair, but babylights stay gentle and grow out softly.
They’re also the right move for anyone adding face-framing brightness without committing to a bold change or for dark blondes and light brunettes chasing all-over glow without stripe work.
The cumulative brightness never looks streaky.
You get soft radiance, the kind often seen on Margot Robbie, and a refresh is needed every 8–12 weeks. That timeline makes babylights a low-maintenance win for dimensional color that doesn’t announce itself.
5. Ombre and Sombré
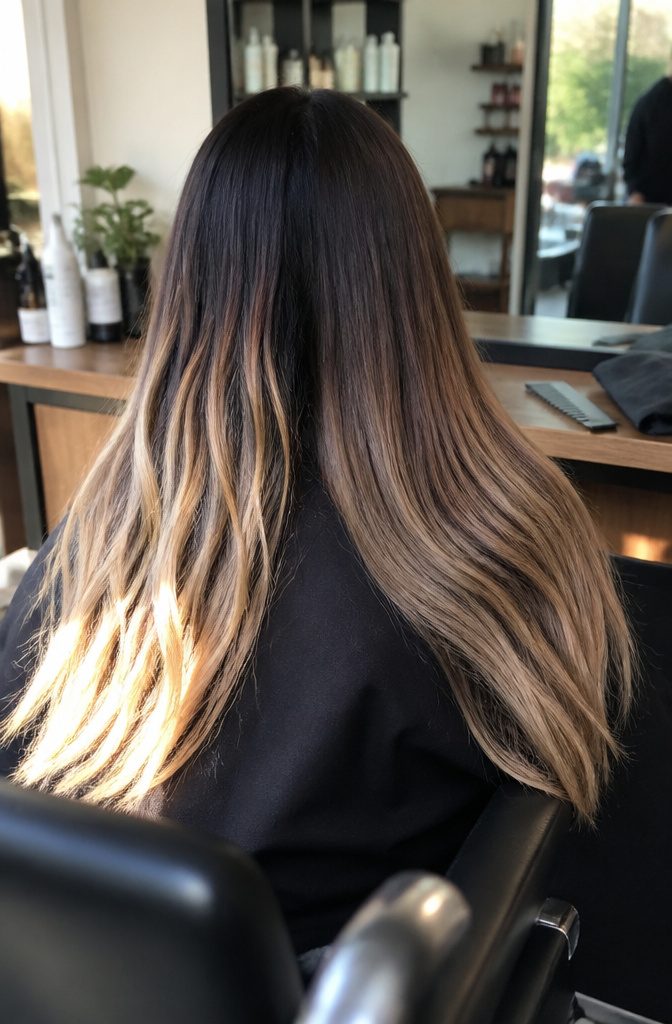
Ombre builds dimension with a darker root that transitions to much lighter ends, and the contrast is stronger than what balayage gives you.
The gradient is deliberate, not subtle. That intentional root means regrowth becomes part of the look rather than something to fix, which makes ombre perfect if you can only get to the salon every three to four months.
Sombré softens the idea. The transition is still root to ends, but the blend is gentler and the contrast pulled back.
I think of it as ombre for someone who wants the low-maintenance timing but prefers a look that reads more natural in bright light.
Both techniques create movement without needing frequent touch-ups, and both let you experiment with lighter tones without committing to full coverage or constant upkeep.
6. Color Melting
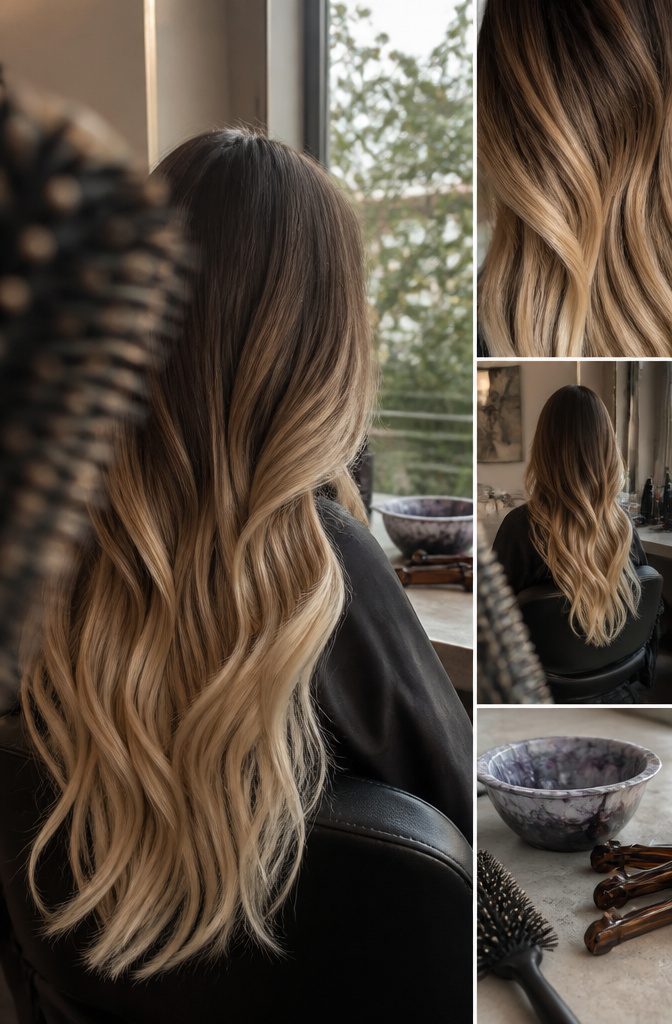
Color melting takes three to four complementary shades and blends them so smoothly you can’t spot where one ends and the next begins.
The darkest tone sits at the root, the lightest at the ends, and the middle shades graduate between them without the hard lines foil highlights leave behind.
That smooth transition is what makes the color look expensive rather than obviously processed.
The technique works because the eye reads flowing gradients as natural dimension. No stripes, no obvious grow-out, just movement that looks like it was always there.
Expect to book appointments every eight to ten weeks to keep the blend fresh as the color fades and root growth pushes the darkest shade further down.
7. Foilayage
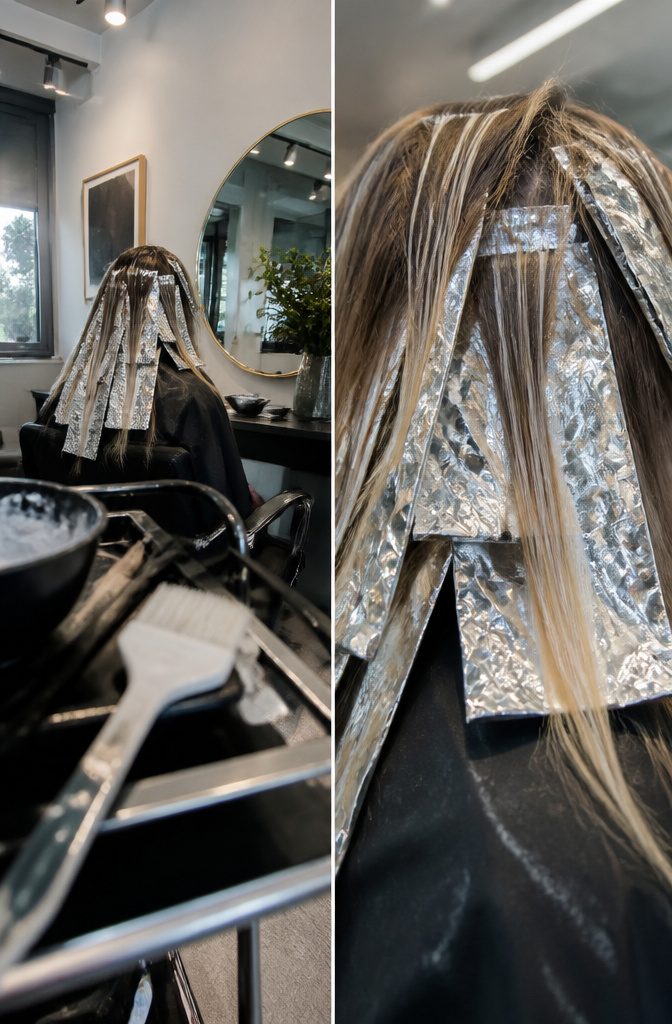
Foilayage splits the difference when you want lift that balayage alone can’t deliver but still need the result to look soft rather than striped.
The technique wraps hand-painted sections in foils, which traps heat and pushes the lightener further up the cuticle without the hard lines traditional foils leave behind.
It pulls noticeably brighter than open-air balayage while keeping the gradual fade that makes dimension look natural.
The tradeoff shows up in the chair time and the calendar. Foilayage takes longer than straight balayage since each painted section gets wrapped, and you’ll be back in every 8 to 12 weeks rather than stretching it to four months.
That schedule lands between balayage maintenance and traditional highlights, which makes sense given that the brightness sits somewhere in the middle too.
8. Midlights
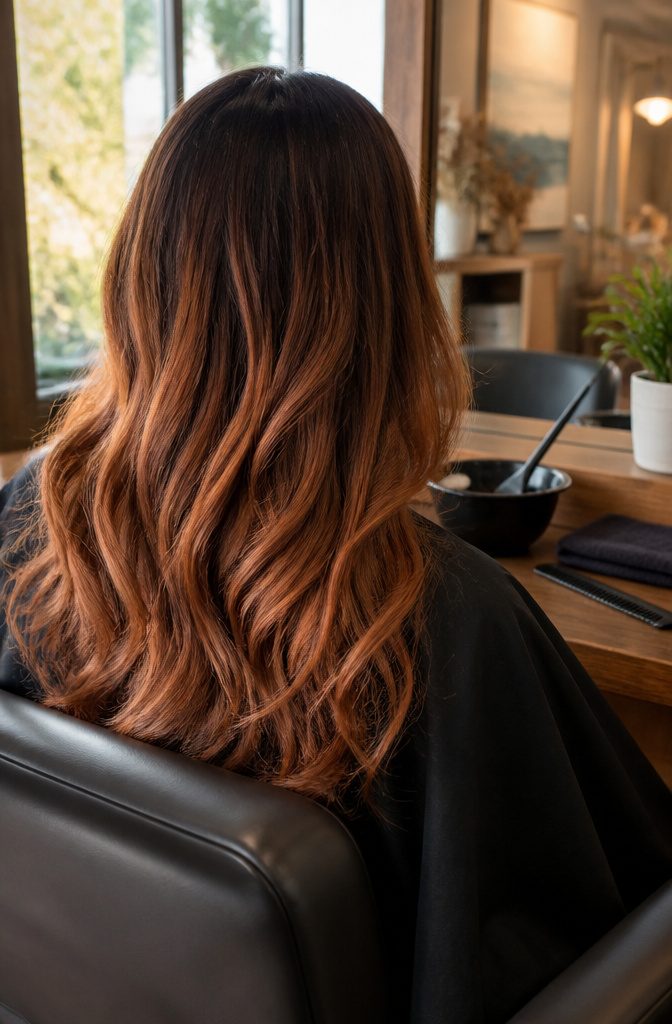
Midlights sit between your highlights and lowlights, blending the two instead of letting them stripe.
The technique centers on mid-lengths rather than the scalp, which means fewer root appointments and less maintenance overall. You’re adding dimension where movement shows, not chasing regrowth every five weeks.
The color itself lives around a 7, 8, or 9, placed two levels lighter than your base and no more than two levels darker than your existing highlights.
That range connects the darkest and lightest pieces without a visible jump. Emma Stone’s colorist layered tones through her mid-lengths using Igora Vibrance, softening the contrast into blended auburn instead of banded foils.
The goal stays the same regardless of technique: believable, dimensional color that reads as natural rather than applied in sections.
9. Reverse Highlights
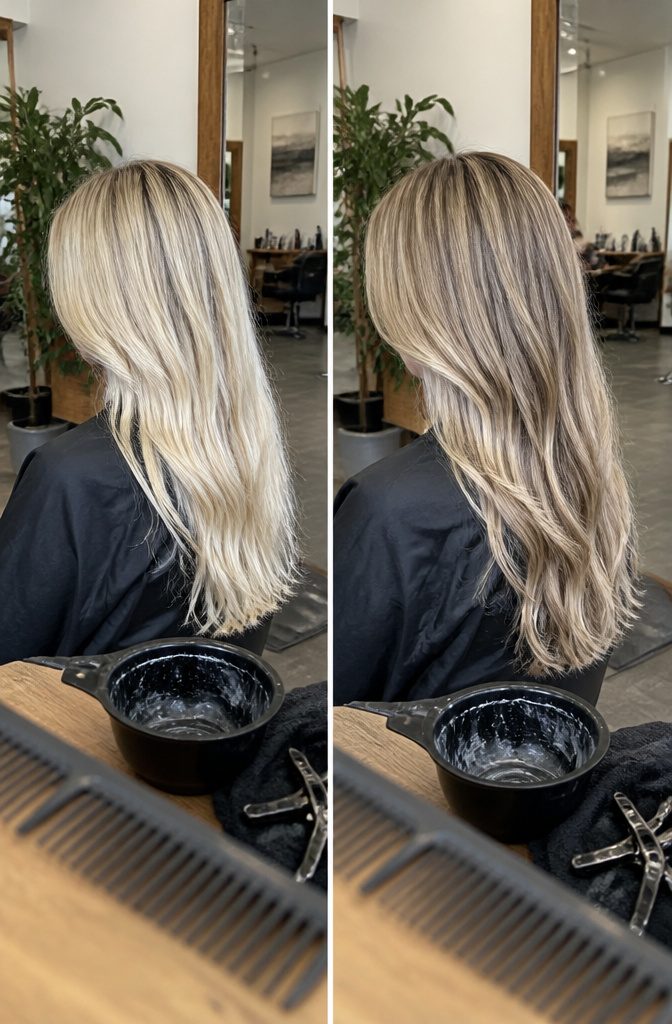
Darker pieces added to pre-lightened hair bring back the contrast blonde can lose after months of lightening.
Instead of painting lighter strands into darker hair, reverse highlights drop deeper tones into already-lifted bases. The result looks richer without pushing the whole color darker.
I find this particularly useful when blonde starts reading flat or overly bright.
A few caramel or ash pieces woven through create separation and make the existing blonde look more expensive. The added depth mimics what natural blonde does in different light, which single-process color rarely manages on its own.
Placement matters. Concentrate darker pieces around the face to frame features, or scatter them through the mid-lengths for allover dimension.
You can also use them to soften an overly bright section or create a shadow root that makes grow-out less obvious. Plan on appointments every 8–10 weeks to keep the contrast visible as the base lifts over time.
10. Chunky Highlights
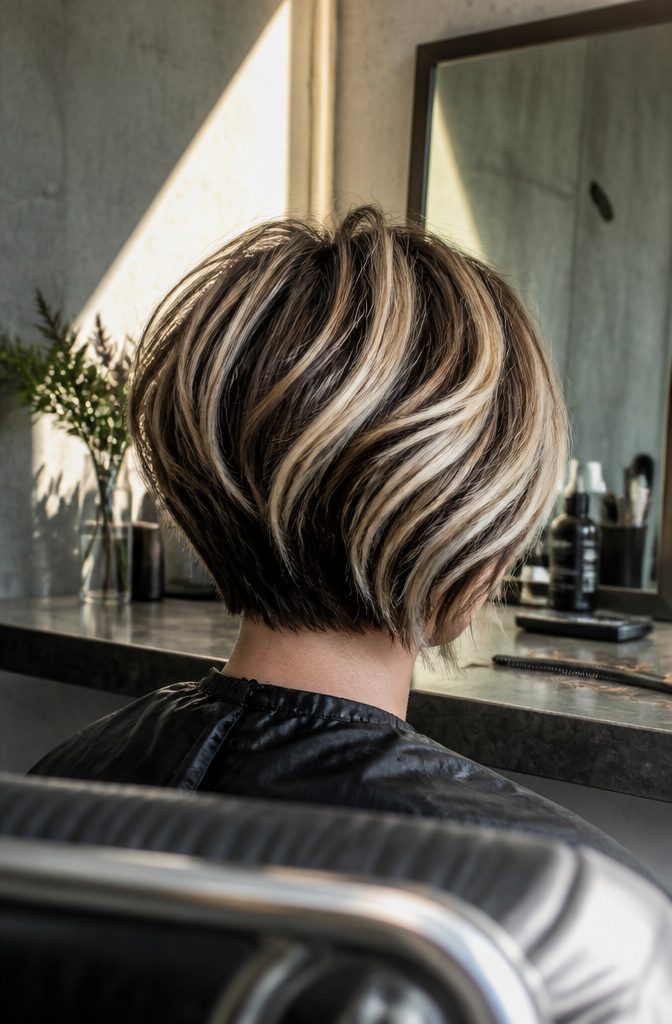
Chunky highlights work with thicker, more visible sections of lightened hair rather than the fine, woven strands you get with traditional highlights.
The contrast is intentional and high, which makes the placement matter more. Modern versions lean editorial instead of retro: they read as a deliberate fashion choice rather than the thick Y2K stripes that covered Kelly Clarkson’s Thankful album.
The swaths are still bold, but the spacing and color lift are more considered now. If you want dimension that announces itself rather than blending softly into the base, chunky highlights give you that.
They sit somewhere between subtle balayage and full commitment to a second color, and they grow out with a visible line rather than fading gradually.
11. Money Pieces
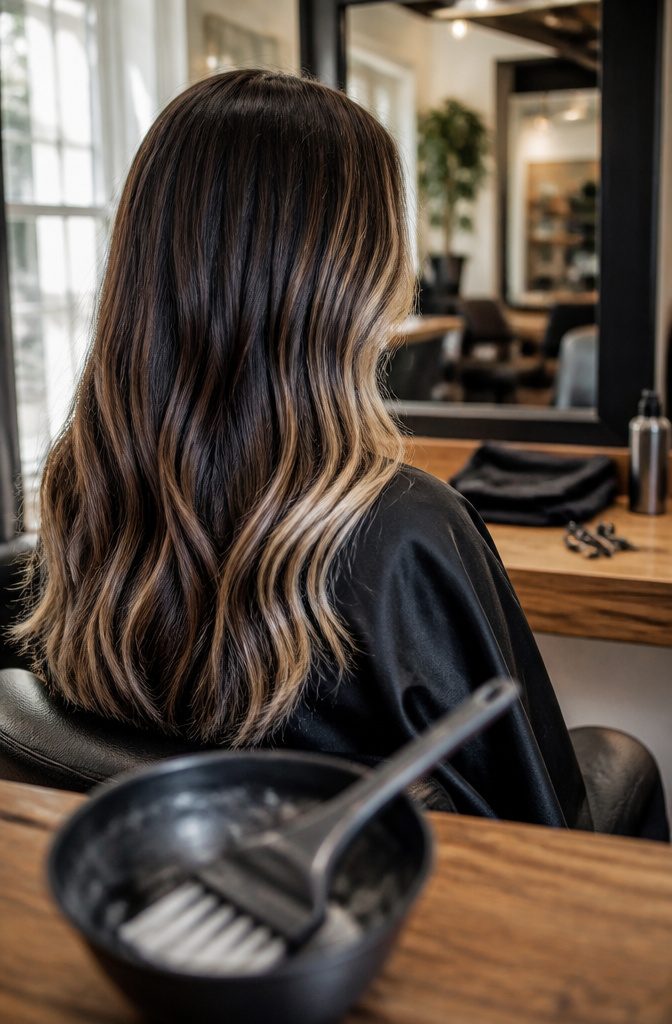
Money pieces put two to four shades of brighter color right along the front where they frame your face. They sit at the perimeter and work like contouring, drawing attention forward without committing to a full head of foil.
A colorist only has to touch the sections that show, which makes the chair time short and the grow-out less obvious.
The effect can land subtle or bold depending on how far you jump from your base. I prefer the bigger contrast because it reads as intentional rather than highlights that have been there too long.
Three to four shades brighter than your starting color gives the face-framing impact money pieces are named for. Anything less starts to blend in after a few washes.
12. Shadow Root
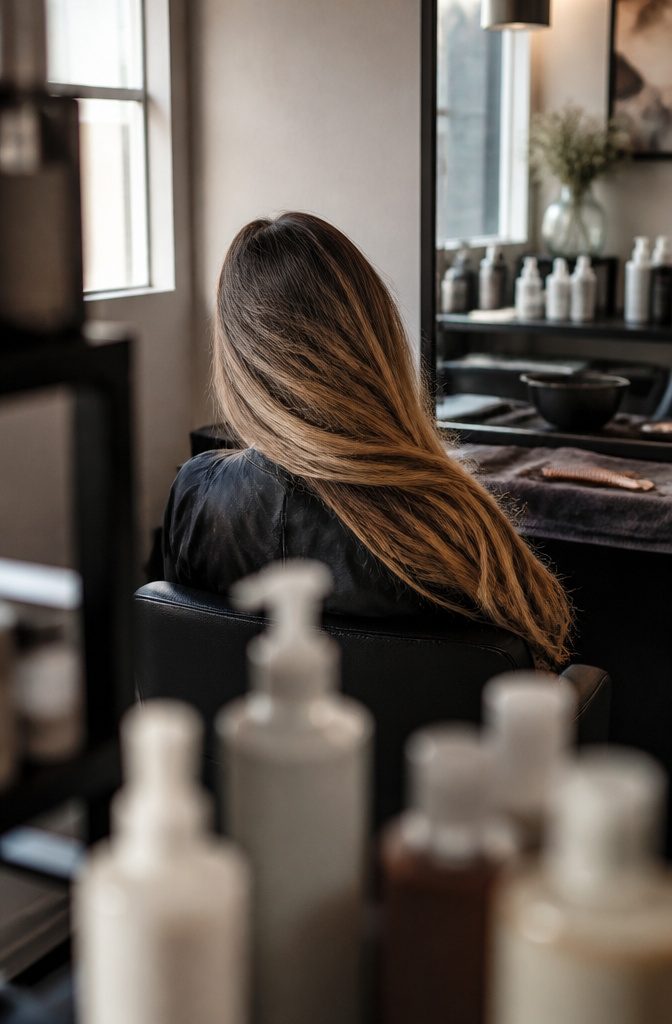
A darker root that blends into lighter lengths minimizes the work between salon visits. The gradient is intentional, which means your natural regrowth becomes part of the look instead of something you need to cover every six weeks.
You can stretch appointments to every three or four months without the color looking neglected or showing a hard line where the old color stops.
Shadow root pairs well with balayage or highlights layered through the rest of the hair. The darker base anchors the dimension and keeps the overall look from reading as flat or single-toned, even as the color grows.
That depth near the scalp also prevents the washed-out effect that can happen when lighter tones sit right against the root, especially if your natural color is medium to dark brown.
13. Face-Framing Highlights
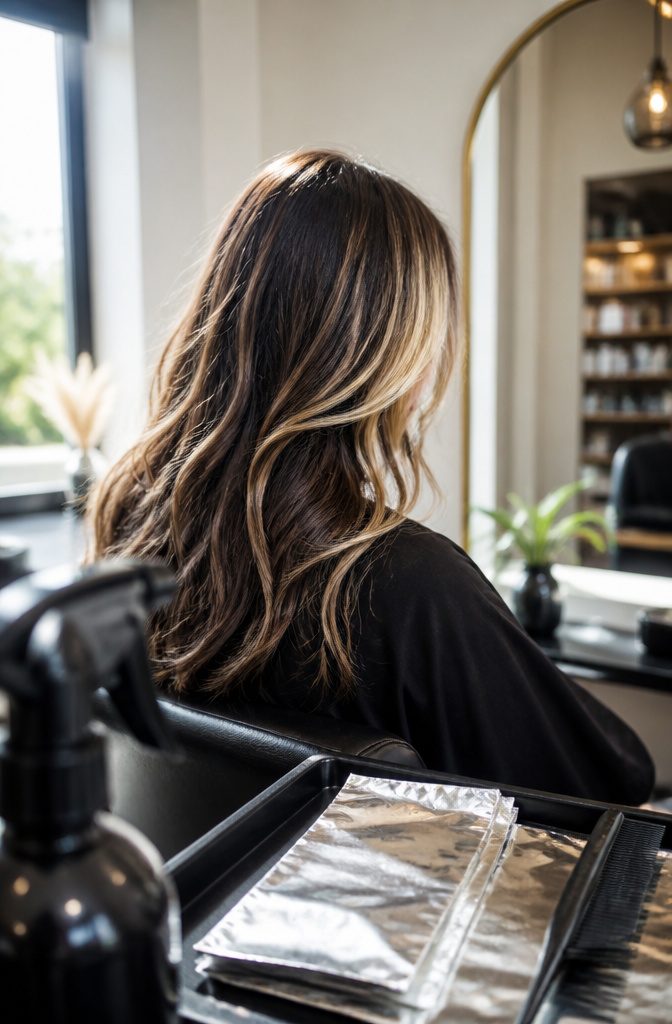
Highlights placed around the face brighten your complexion without touching the whole head. The approach frames features and creates contrast where it shows most, typically three to four shades lighter than your base for noticeable lift.
Placement matters: foils wrapped close to the hairline catch light when you move and soften the overall look, while chunky pieces right at the temples make a bolder statement.
You can lean warm or cool depending on skin tone and eye color.
Warm tones pull golden, cool tones read ashy or platinum. Either way, the technique skips most of the head, so it’s gentler on hair and faster in the chair than an all-over color.
The change reads immediately but grows out without a hard line, which keeps maintenance lower than you’d expect from something this visible.
14. Dimensional Reds
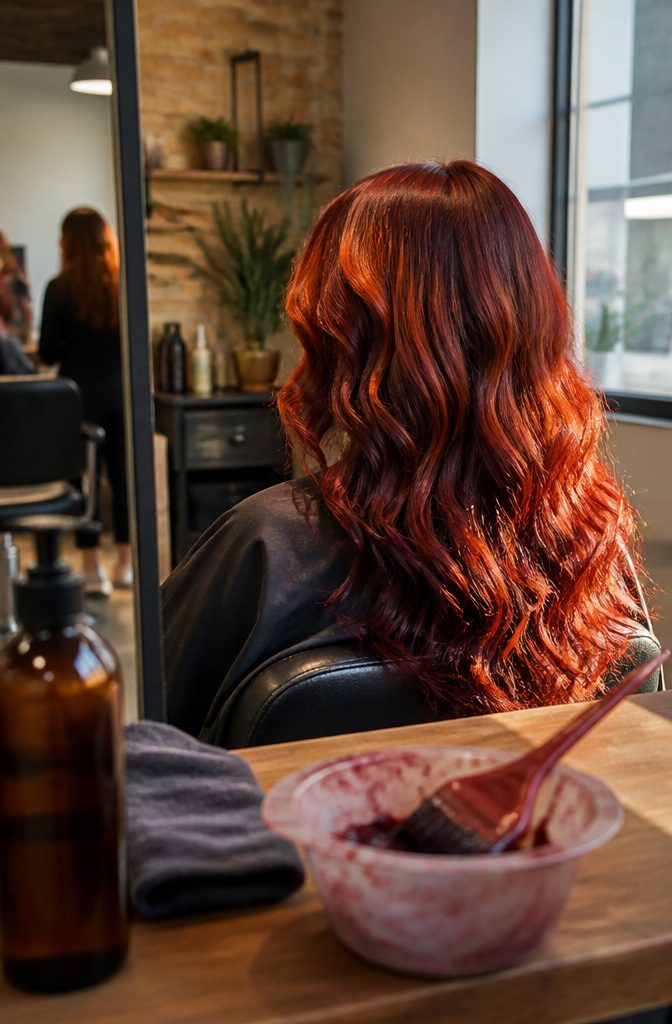
Red hair gets depth the same way brunette and blonde do: by mixing tones instead of laying down one flat shade. Highlights and lowlights together give reds the contrast that makes the color look dimensional rather than painted on.
A stylist might weave in deep burgundy lowlights to anchor the base, then lift sections to bright copper or golden red for the lighter pieces. The darker tones sit in shadow and make the brighter ones catch light.
The technique keeps red from looking flat. Lowlights add the darker pieces back in to build contrast, and the lighter sections stand out against them.
That interplay between deep and bright is what reads as movement. The finish looks more like natural variation than a single dye job, and proper care with color-protecting shampoo keeps the tones from fading into one dimension.
15. Cool Ash Blonde
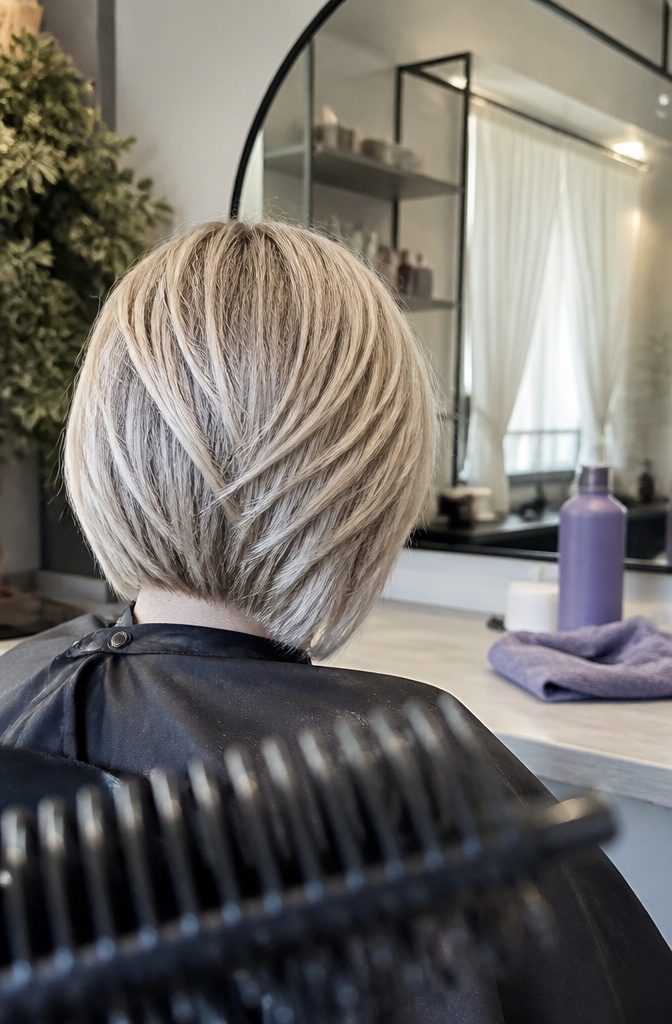
Cool ash blonde builds depth by mixing light and dark shades within the same cool family, keeping the overall look sleek rather than high-contrast.
The palette stays in the silver, ash, and platinum range, which means no warmth bleeding in to soften the effect.
That restraint is what makes the style work: when every tone holds the same temperature, the different values layer together without looking choppy.
The multi-tonal approach suits cooler skin tones naturally, though it also reads as a deliberate contrast on warm complexions.
Either way, the dimension comes from value shifts, not from warm versus cool. Purple shampoo keeps the tones from drifting yellow, which is the fastest way to lose the ash finish.
The look works across any length, but shorter cuts show the layering more clearly because you see more of the placement in a single glance.
16. Caramel Accents
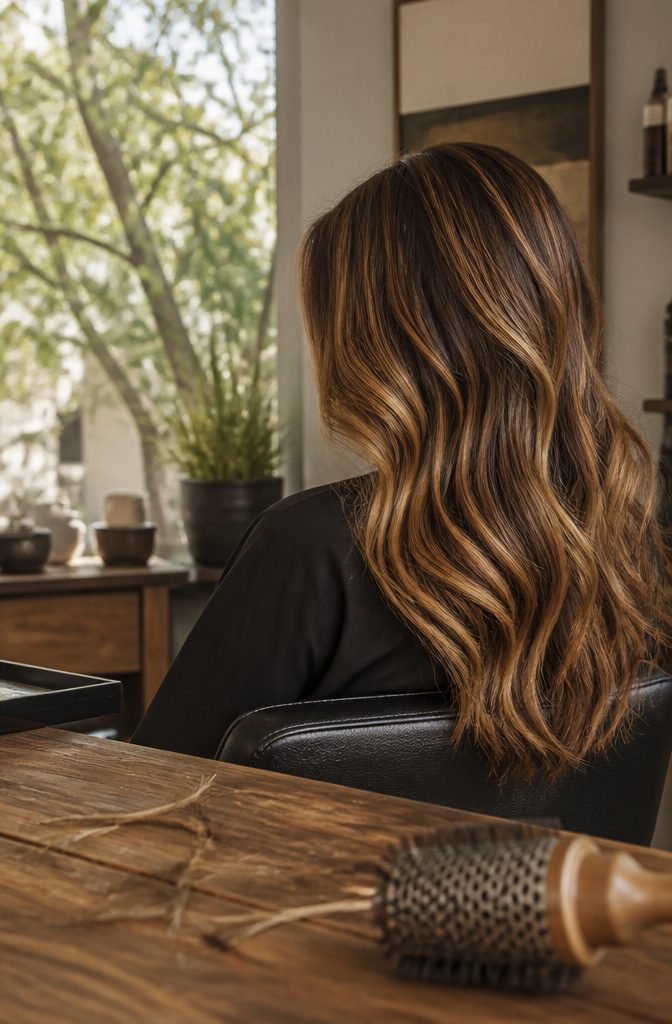
Caramel highlights work by adding golden warmth that contrasts naturally with your base color, whether you start with dark brown, medium brown, or existing blonde.
The warmth reads as sun-kissed rather than obviously colored, and the contrast creates dimension without the hard edges you get from platinum or icy tones.
On brunette hair, caramel sits lighter than your base but stays in the same warm family.
Think toffee, amber, honey. The highlights catch light and break up solid color, giving movement when you turn your head.
On blonde hair, caramel goes the opposite direction: it adds depth as a lowlight or a richer midtone, keeping the overall look from washing out into one flat shade.
The same color does two different jobs depending on where you start.
17. High-Contrast Brunette
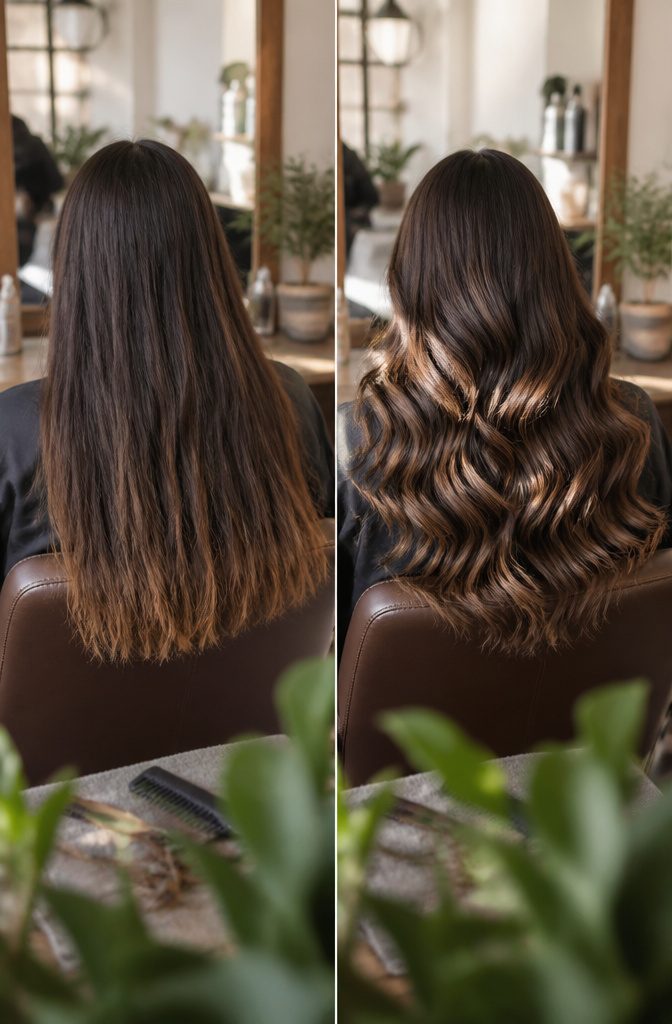
High-Contrast Brunette
Combining lighter and darker shades within the same brunette family builds texture you can see, especially when light catches curls or waves.
The darker tone anchors depth at the base, the lighter shade lifts mid-lengths and ends, and the contrast between them makes hair look fuller without adding actual volume. It reads as movement rather than flatness.
The effect works particularly well on fine or damaged hair because you’re working with complementary tones instead of a single all-over lift. Fewer touchups, less processing overall.
On darker strands, the dimensional technique creates what looks almost like a lamination effect: more shine, more separation between individual pieces, more visual weight. The illusion is depth and vibrancy from contrast alone, not from piling on product or heat.
18. Smokey Blue Hues
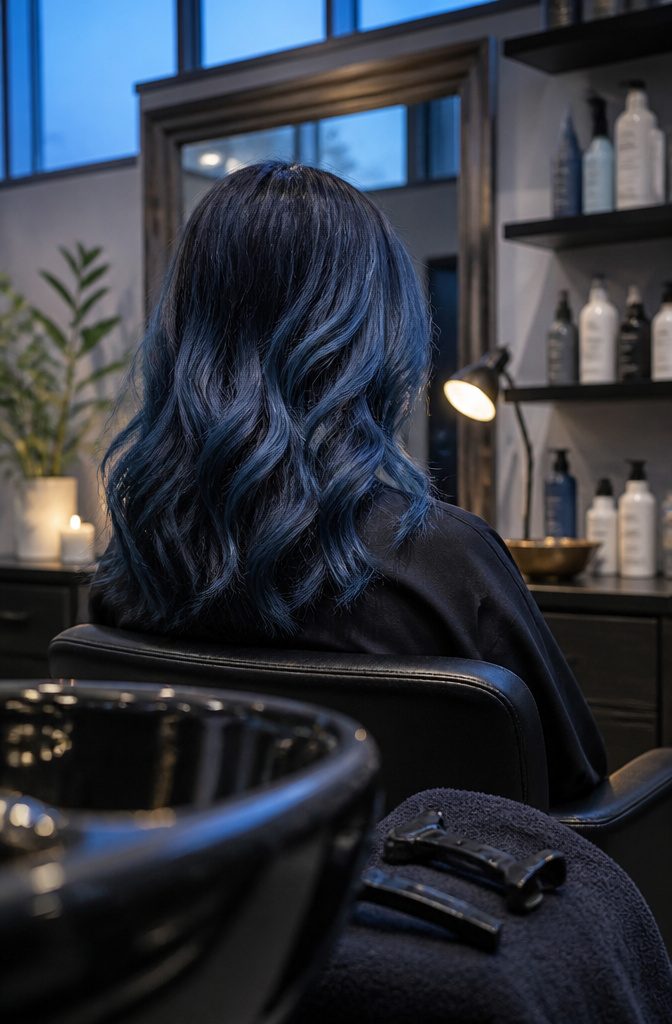
Smokey blue hues blend dark and light blues for a multi-tonal effect that reads bold and edgy rather than subtle.
The contrast between the tones gives the color depth without leaning on a natural gradient, and the cool palette suits anyone ready to commit to a look that stands out.
Pairing the blues with a darker base color adds even more contrast and keeps the lighter tones from washing out against your scalp.
The effect is bolder than ash or platinum but still built on layered dimension rather than a flat block of color.
Maintenance centers on vibrancy. Color-safe shampoos keep the blues from fading to dull teal or gray, and the cooler the water you rinse with, the longer the tones hold.
I’d say this one works best if you already know you like high-impact color and don’t mind the upkeep that comes with it.
19. Melting Chocolate
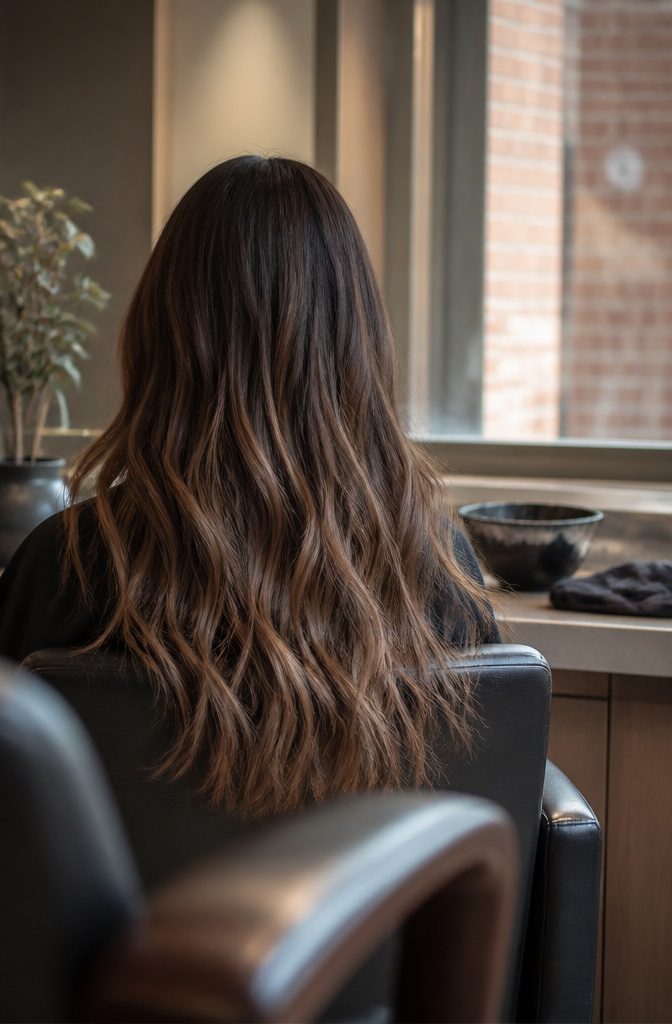
Warm and cool brown shades blended together give you depth without hard edges.
A typical melting chocolate color uses three to four complementary chocolate tones that graduate from darker roots to lighter ends, and the transition between them is smooth enough that you can’t tell where one shade stops and the next begins.
The technique works because it layers both warm and cool browns rather than leaning only one direction. That variation keeps the color from reading as flat or one-note, and the gradient mimics the way natural hair lightens toward the ends.
The result looks expensive without announcing itself, and grow-out stays subtle because there’s no stark line where color meets root.
Melting chocolate suits both short and long hair. The color flows along whatever length you’re working with, and the understated contrast makes it a solid choice if you want dimension that doesn’t scream for attention.
20. Warm Honey Tones
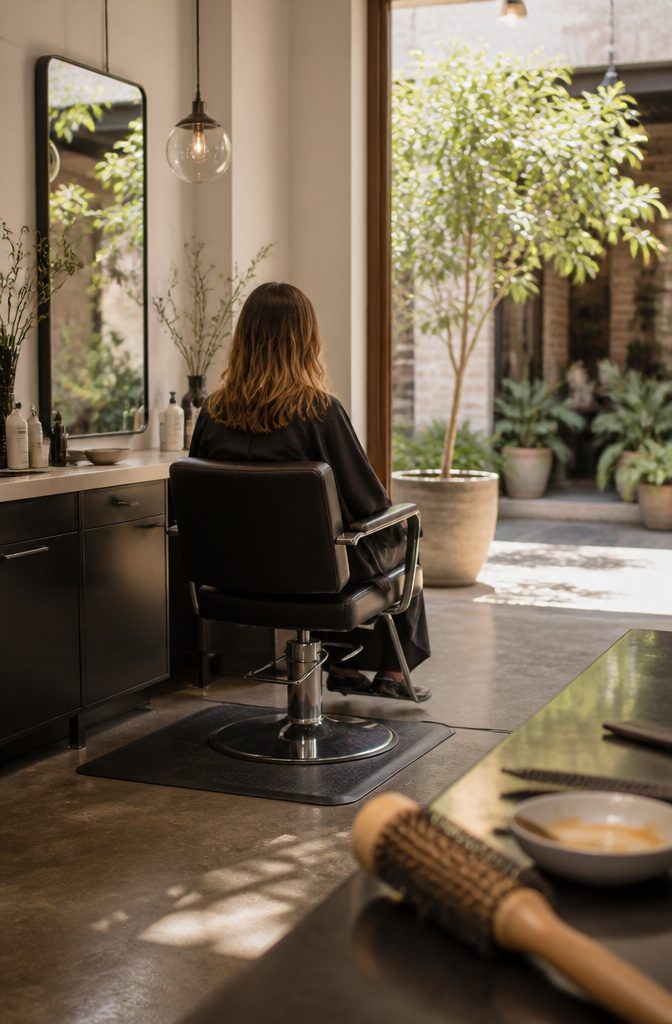
Honey brightens the strands it touches and warms the tone around them, so the effect is a soft glow rather than a hard stripe of color. That is why it reads as sun-kissed instead of dyed.
I rank it as the safest pick on this list for anyone nervous about a first dimensional color.
It works over any base color, and the change is subtle yet noticeable: people see brighter, warmer hair without being able to say what changed.
Upkeep is easy, and honey flatters in every season, so it doesn’t need swapping out when the weather turns. Bring a photo of the exact warmth you want, since "honey" can run from pale and golden to deeper and richer.
21. Icy Platinum
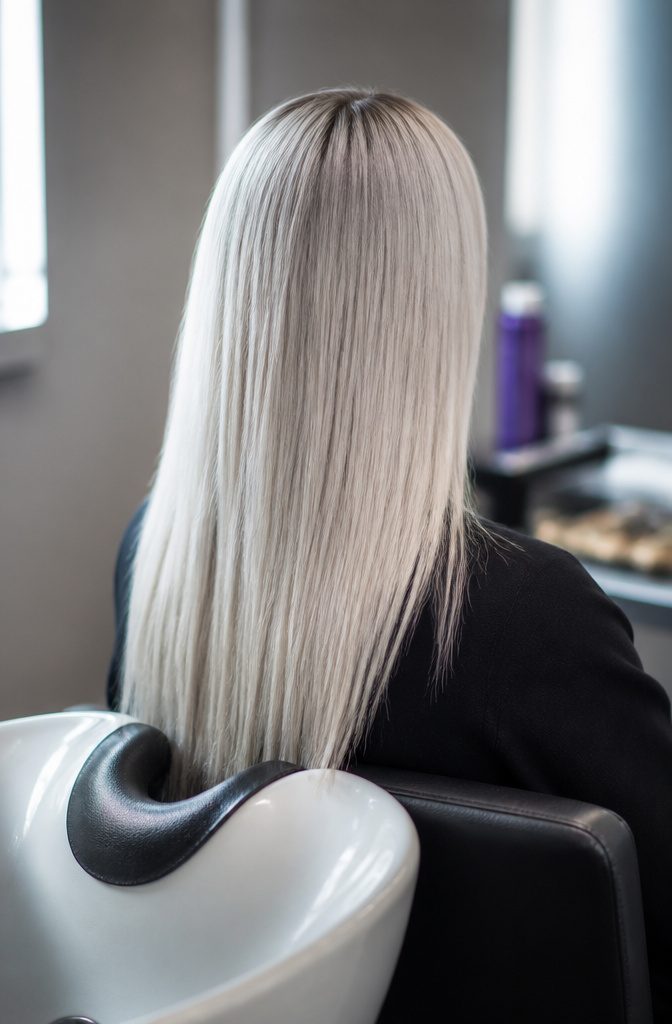
Icy platinum sits right at the cool end of the blonde spectrum: reflective, almost metallic, and unapologetically bold.
The look reads modern and edgy in a way that warmer blondes don’t, but it asks for precise application and frequent upkeep to keep those tones from sliding yellow or brassy.
Purple shampoos and conditioners become part of the weekly routine, not an occasional fix.
This is high-maintenance color.
Roots show fast against that level of contrast, and the brightness fades if you skip toning sessions. If you want a dramatic statement and you’re ready to book touch-ups every four to six weeks, platinum delivers.
If you’d rather stretch time between salon visits, a shadow root or a slightly warmer blonde will give you more breathing room without losing the dimensional effect.
22. Copper and Auburn Blends
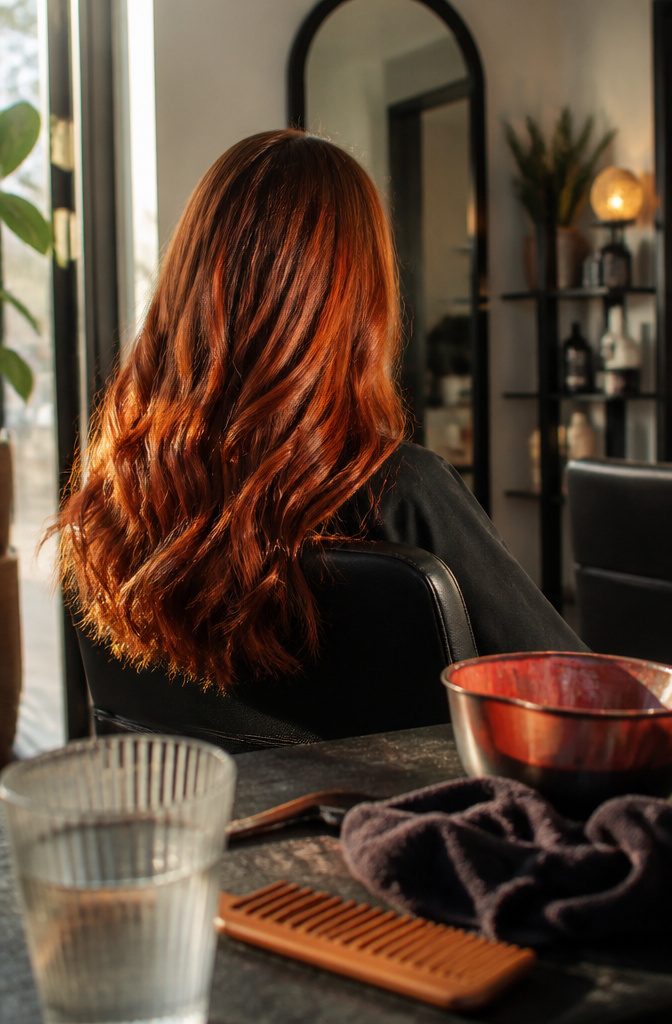
Copper and auburn work best as a pair. Copper brings the fiery warmth, auburn sets a deeper red-brown beneath it, and together they give hair a rich, radiant glow instead of one flat shade of red.
That warmth suits a wide range of skin tones, so I count it among the safer bold choices on this list. It looks natural yet still catches the eye.
The cost is upkeep. Regular touch-ups keep the color bold, since the whole appeal is the glow, and a faded blend loses the contrast between the two shades.
How Technique and Placement Change the Result
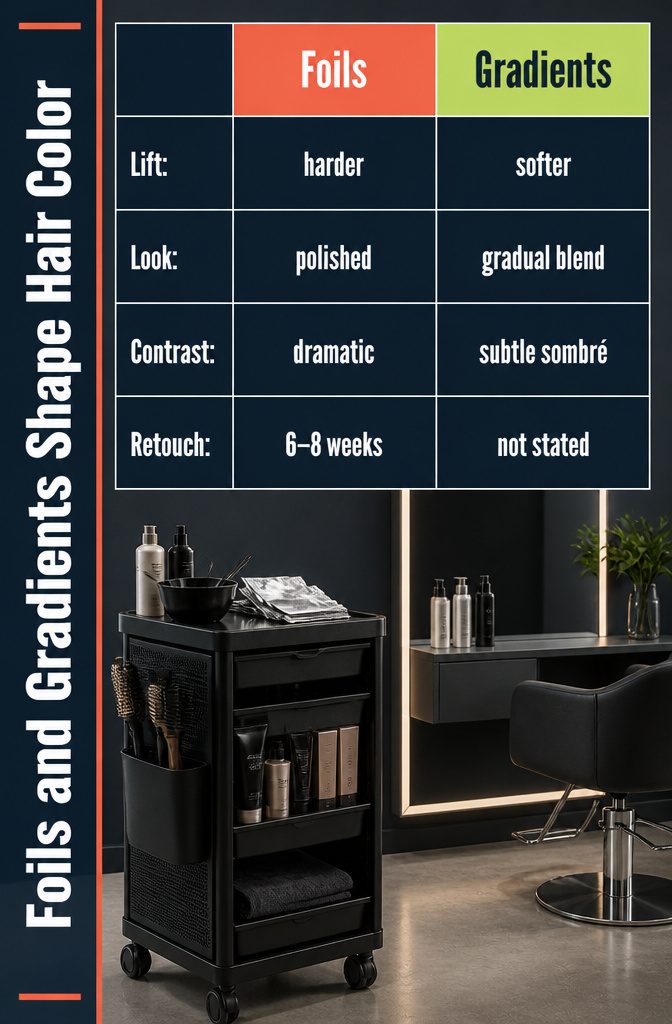
Foils trap heat, so the lightener lifts harder, which makes them the better choice for dramatic contrast on brunettes. Uniform foil placement gives an even, polished look, and it needs a touch-up every 6–8 weeks.
Gradients run softer. Ombré can shift drastically from root to end, while sombré keeps the tones close to your base for a sun-tanned look rather than a visible line.
Darker pieces often add more dimension than extra brightness. Dark strands create shadow that makes the lighter ones pop, and I’d reach for them first on hair that looks flat and one-note blonde.
Face framing is the easiest place to start. A soft blend brightens your complexion; a bold, contrasting shade makes a statement.
Choosing Colors for Your Base and Skin Tone
Choosing Colors for Your Base and Skin Tone
The shade you start with decides which colors will read as dimension and which will just look like you dyed your hair a slightly different color.
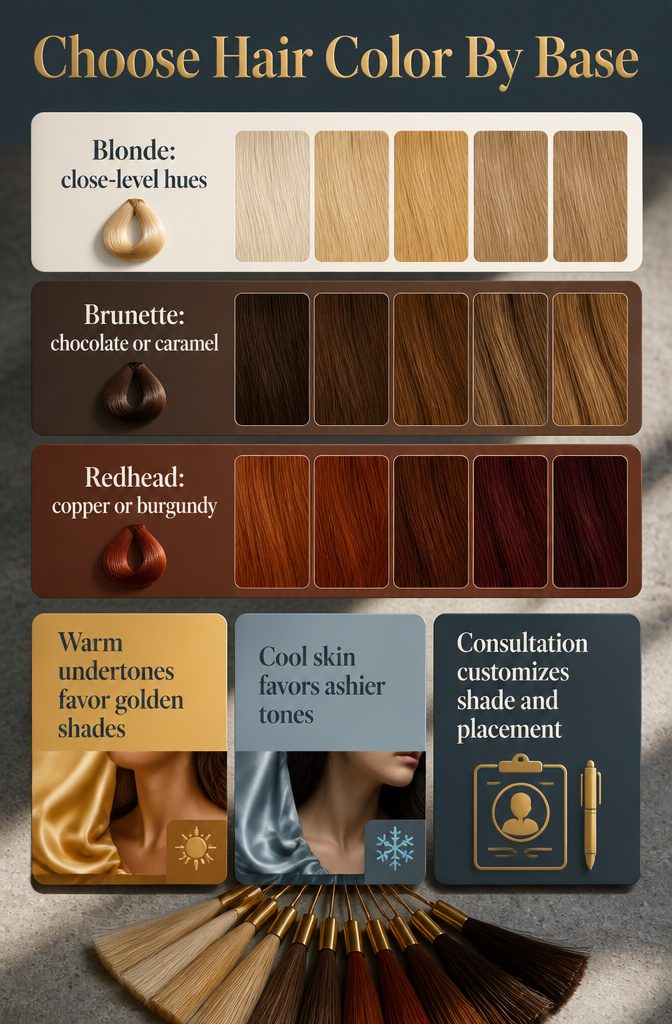
Blondes get the most visible lift from close-level blonde hues, shades only a tone or two lighter than the base, because the contrast stays soft enough to look like natural variation.
Brunettes pull depth from chocolate or caramel undertones, layered as lowlights and highlights so the color shifts as you move. Redheads lean into coppery or deep burgundy blends, where the warmth already in the hair gets amplified rather than fought.
Skin tone tips the balance between warm and cool.
Warm undertones favor golden shades, cool skin reads better with ashier tones. A consultation lets a colorist customize both the shades and the placement, matching your hair texture and how much time you want to spend on upkeep.
Bring photos, but stay open to adjustments based on what your hair can actually hold.
At-Home Application in Five Steps
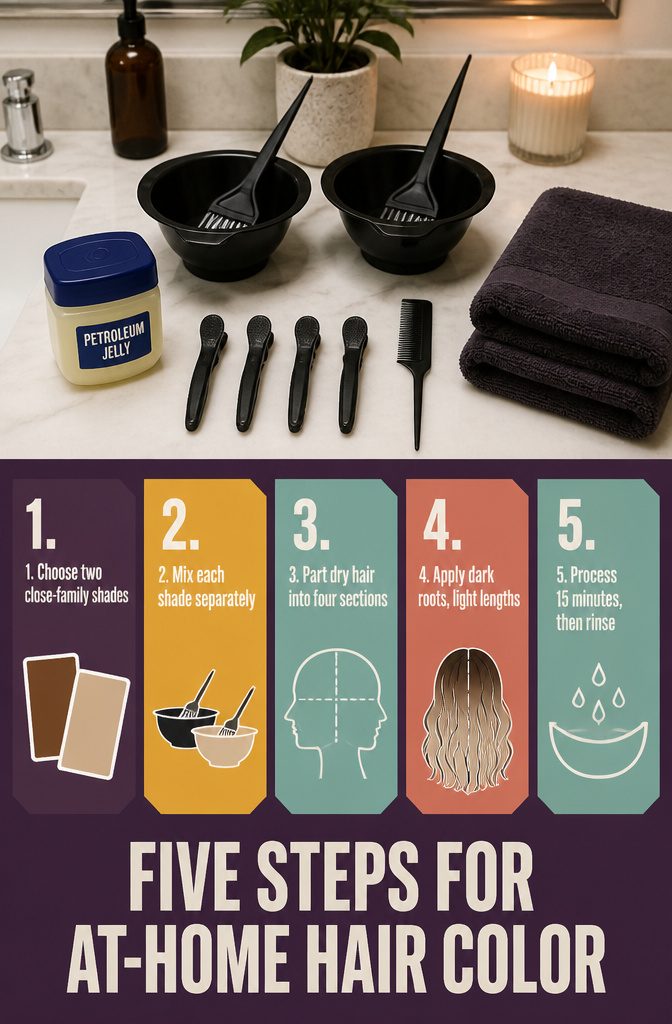
- Choose two shades from the same color family, no more than two levels apart. Closer tones blend naturally; anything wider reads as a sharp contrast rather than dimension.
- Set out two plastic mixing bowls, two color brushes, a rattail comb, sectioning clips, petroleum jelly for your hairline, and a couple of old towels. Mix the darker shade with 20 Volume developer in one bowl and the lighter shade with 30 Volume in the other.
- Work on dry hair. Part it straight down the center from forehead to nape, then ear to ear across the crown. Pin each of the four sections out of the way.
- Apply the darker color at the roots and along the hairline where regrowth shows first, then switch to the lighter mix on mid-lengths and ends. The contrast sits where hair moves.
- Let each shade process for 15 minutes, then rinse until the water runs clear. The timing matters more than you think; go past it and the lighter pieces pull too bright.
Damage, Hair Condition, and Bond-Building Treatments
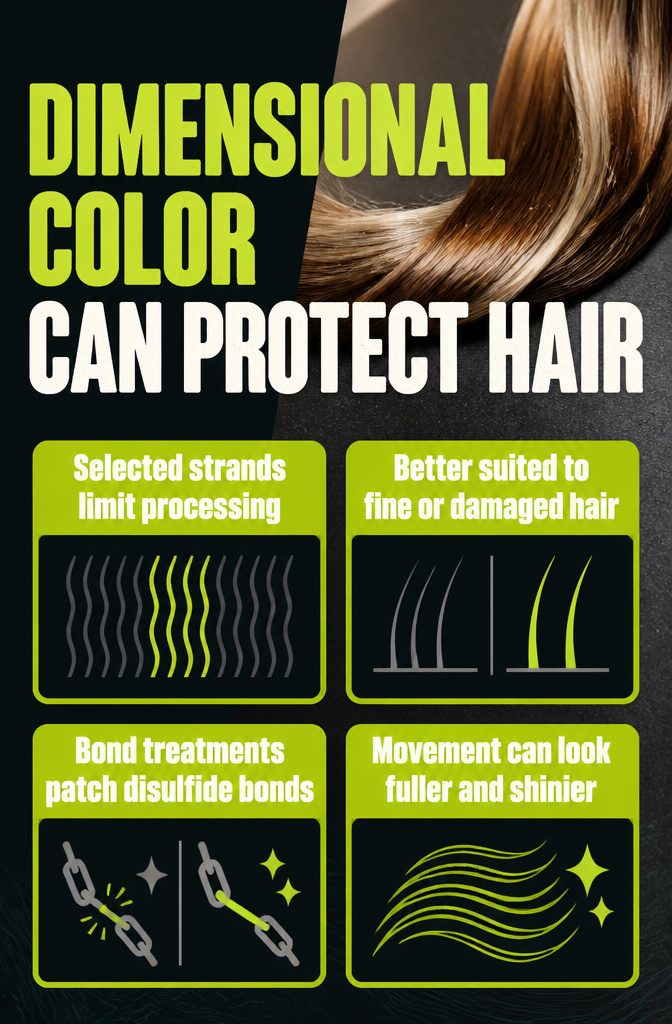
Any chemical process comes with some potential for damage, but dimensional color techniques process only selected strands rather than your entire head, so less hair goes through the lift and deposit cycle.
The technique suits fine or damaged hair better than all-over color for exactly that reason.
Bond-building treatments make the difference between color that weakens hair and color that leaves it looking healthier than it started.
Lanza Rapid Bon Resonstructor is one option salons mix into dimensional services to patch disulfide bonds as they break during processing.
The added movement and light reflection from dimensional color can actually make hair look fuller and shinier than flat single-process color, especially if the base was already compromised.
You walk out with contrast that reads as depth rather than hair that feels like straw.
Blending Gray Hair With Dimensional Color
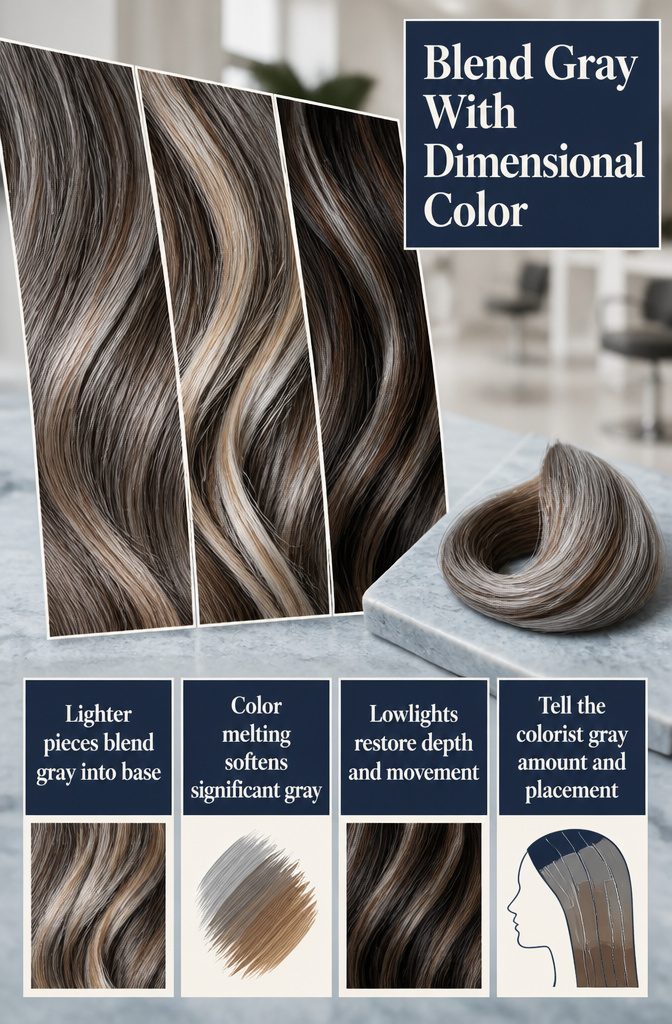
Yes, dimensional color works on gray hair, and I’d pick it over a flat single shade. Lighter pieces blended into your base color take the gray in as part of the pattern, so you stop fighting it strand by strand.
For significant gray, combine color melting with lowlights. The melt blends the gray into the surrounding shade, and the lowlights put depth back in, so you get real coverage and still see movement.
Ask for both by name at the consult, and say how much gray you have and where it sits, since that decides how much of each the colorist needs.
Frequently Asked Questions
What is the difference between balayage and dimensional color?
Dimensional color is the overall result: light, medium, and dark tones from the same color family blended together. Balayage is one way to get there, with lightener painted on freehand so the color fades from darker roots into lighter ends.
Other routes to the same effect include foil highlights, lowlights, and babylights, so balayage is one tool and dimensional color is the goal.
How do I get dimension in my hair color?
Mix lighter and darker shades from the same color family instead of using one flat color.
A stylist can do this with balayage, babylights, highlights, or lowlights, usually keeping darker tones near the root and lighter ones through the mid-lengths and ends.
At home, one method uses two complementary shades within 2 levels of each other: the darker on the roots and hairline, the lighter on the mid-shaft and ends, each left on for 15 minutes.
How do I know which dimensional technique is right for me?
Book a consultation and let a stylist weigh your natural color, skin tone, texture, and goals.
Your calendar matters too: balayage can go 3–4 months between visits, while foil highlights need a touch-up every 6–8 weeks. Bringing a photo of the exact look you want helps the stylist match placement and tone.
Will dimensional color damage my hair?
Any chemical process can cause some damage, but dimensional techniques are usually gentler than all-over color because only selected strands get processed.
They also need fewer touch-ups, which helps fine or damaged hair. Many salons add a bond-building treatment during the service to cut down on damage further.
Can I get dimensional color if I have gray hair?
Yes.
Lighter pieces blended with a base color let the gray work as part of the look instead of standing out against it. For significant gray, stylists often suggest color melting combined with lowlights, which gives coverage and movement together.
What are some dimensional fall hair colors?
Warm shades suit fall best: caramel highlights, melting chocolate browns, and copper and auburn blends.
Dimensional reds also work, with deep burgundy lowlights anchoring brighter copper or golden red pieces. Honey tones are another option, since they flatter in every season.