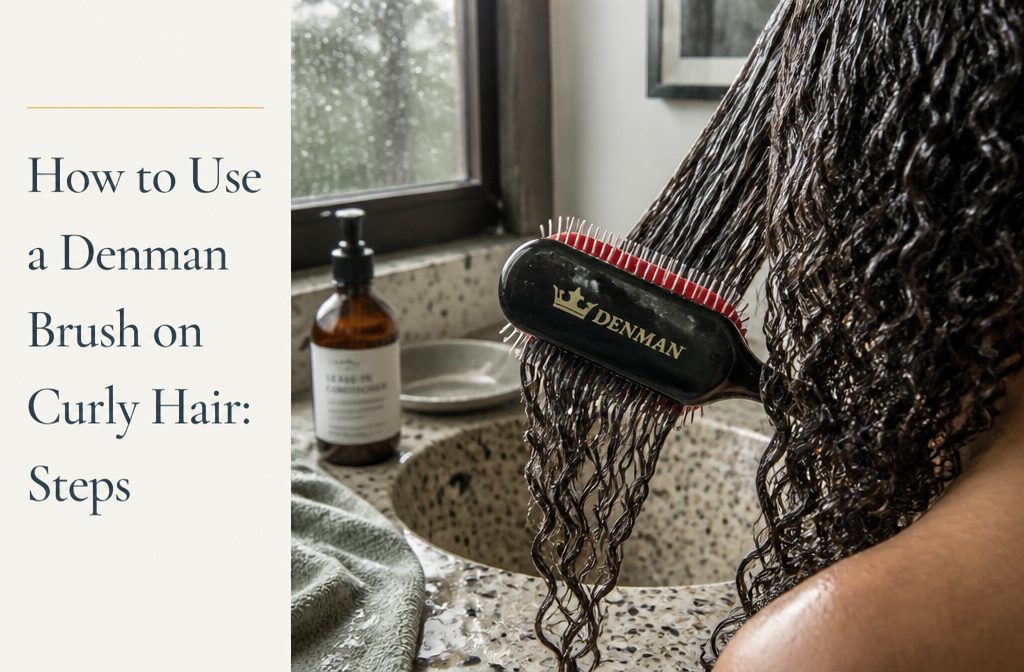
The Denman brush defines curl clumps by creating tension as it moves through wet, product-coated hair, grouping strands together instead of letting them split into frizz.
It only works on soaking-wet or damp hair with leave-in and curl cream already applied, because the firm bristles snag and break curls if there is no slip.
Pick the D3 for looser waves or the D4 for tighter coils that need more grip.
1. Prepare Wet Hair and Add Product for Slip
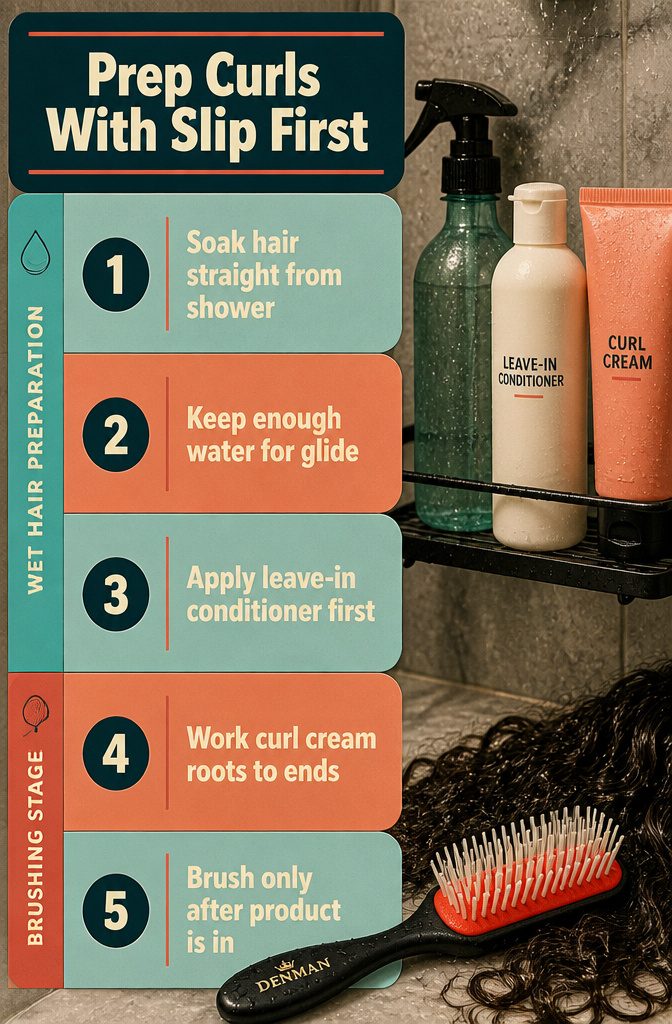
Start with soaking-wet hair straight out of the shower or damp hair that still has enough water for product to glide. The Denman pulls if there is friction, and slip is what keeps it from snagging or yanking curls apart.
I apply leave-in conditioner first, then follow with curl cream, working both through from roots to ends before the brush comes anywhere near my head.
That layer of product does two things: it lets the brush move smoothly, and it starts the distribution work that the brush will finish.
Brushing dry hair with a Denman causes breakage. The bristles are firm enough to define curls when there is slip, but without it they catch and snap strands instead of gliding through them.
Several styling walkthroughs repeat the same warning: only use the brush on wet or damp hair with product already in. Keep a spray bottle nearby if sections start to dry out while you are working through the rest.
2. Work in Small Sections Based on Hair Density
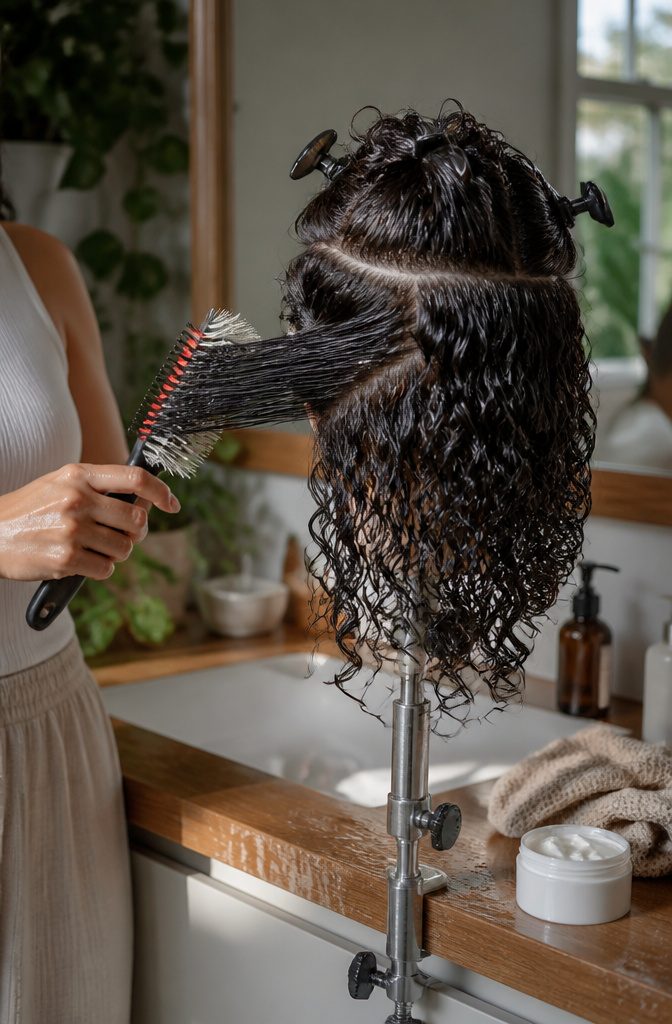
Work in Small Sections Based on Hair Density
Dividing hair into three or four horizontal sections keeps each pass manageable and gives you more control over definition.
More sections mean less hair to wrangle at once, which cuts down on frizz even if your hair is not especially thick.
Denser or tighter curl patterns call for smaller sections within those horizontal layers.
Hair that packs more curl into each inch needs more passes with the brush, and working smaller lets you get tension and coverage on every clump without skipping pieces or smoothing out the pattern you are trying to define.
Brush horizontally away from the scalp rather than straight down.
Pulling the brush outward from the root adds volume at the base and sharpens the curl clump from the start, which makes a difference when the hair dries and you want lift instead of flatness where it meets the scalp.
3. Brush Each Section with a Controlled Motion
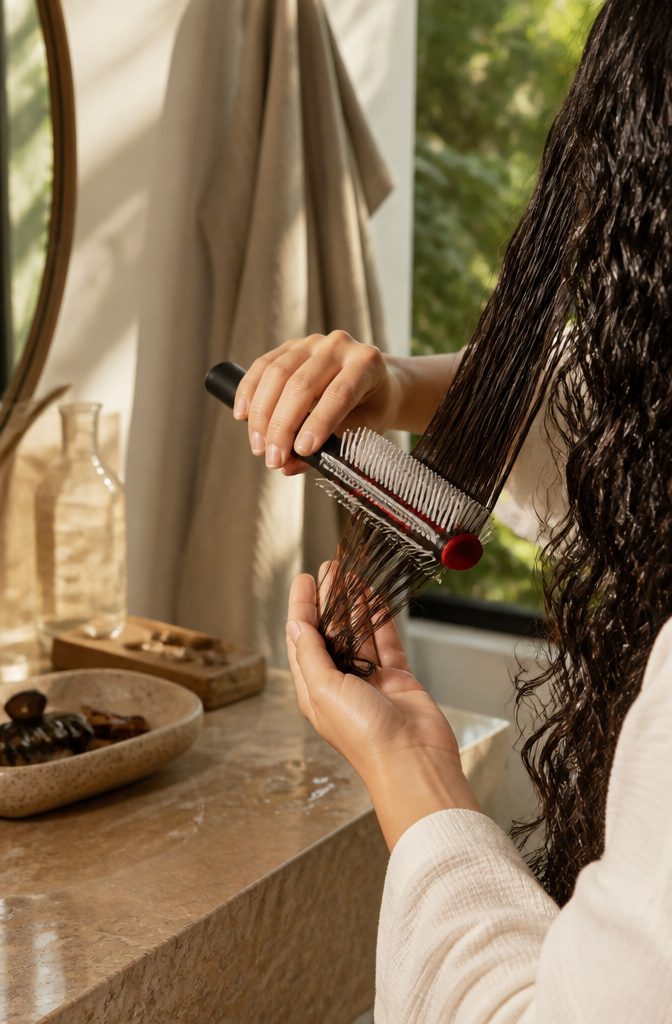
Brush angle sets clump size. Brushing sideways, away from your head, gives thinner clumps.
Brushing downward and twisting the brush upward at the end gives slightly thicker ones. My pick is the downward stroke with tension, because it gives the cleanest definition and is the easiest to repeat on every section.
Two moves to skip: in one video walkthrough, rolling the brush with the bristles facing out and twisting all the way down made oversized clumps that had to be pulled apart, which invites frizz.
Sliding the brush under the hair and pushing outward adds volume but costs definition. Keep the stroke slow and downward, with steady tension from root to end.
4. Scrunch or Finger-Coil for Added Definition
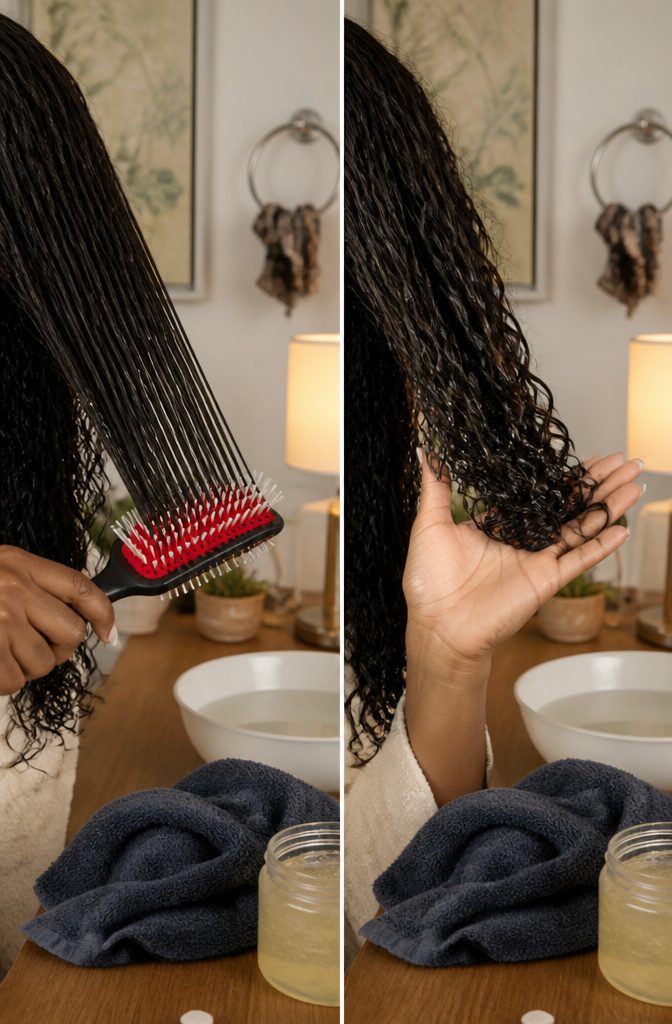
Scrunching comes last in every section. Once the brush has traveled root to tip with the bristles turned upward, roll it under like a curling iron, then scrunch the hair up before moving on.
Finger-coiling is the other route: you shape each curl around a finger by hand.
I’d pick the brush first, because coiling takes longer and gives softer definition. A curly-haired writer who tried both reached the same verdict:
I’ve tried finger-coiling sections instead, but it’s more laborious with less intense results. Think of it like training your hair: Once it gets into the rhythm of clumping together, it will do so more naturally in the future.
Repeat the scrunch every time you brush and the curls will clump more readily.
5. Dry Without Disturbing the Curl Clumps
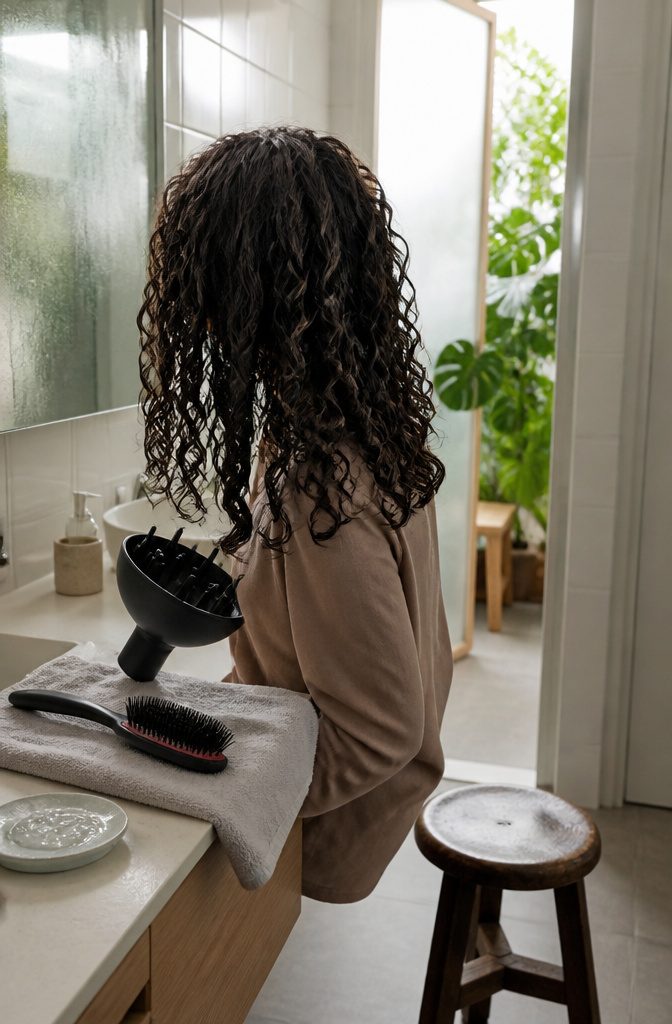
Once the curls are defined, leave them alone while they dry. Air-drying works if you have time and low humidity; diffusing on low heat cuts the wait without destroying the clumps you just formed.
The mistake is touching the hair while it is still wet or damp. Every pass of the hand separates curls, introduces frizz and undoes what the brush did.
Patting wet hair with a microfiber towel pulls out excess water without roughing up the surface, and scrunching in gel after the Denman step locks the definition. The gel dries stiff but breaks apart once the hair is fully dry.
That final step is fluffing at the roots with your fingers, which lifts the hair without separating every curl. The volume comes back, the shine stays, and the defined sections hold their shape through the day.
D3 for Looser Curls, D4 for Dense or Tight Curls
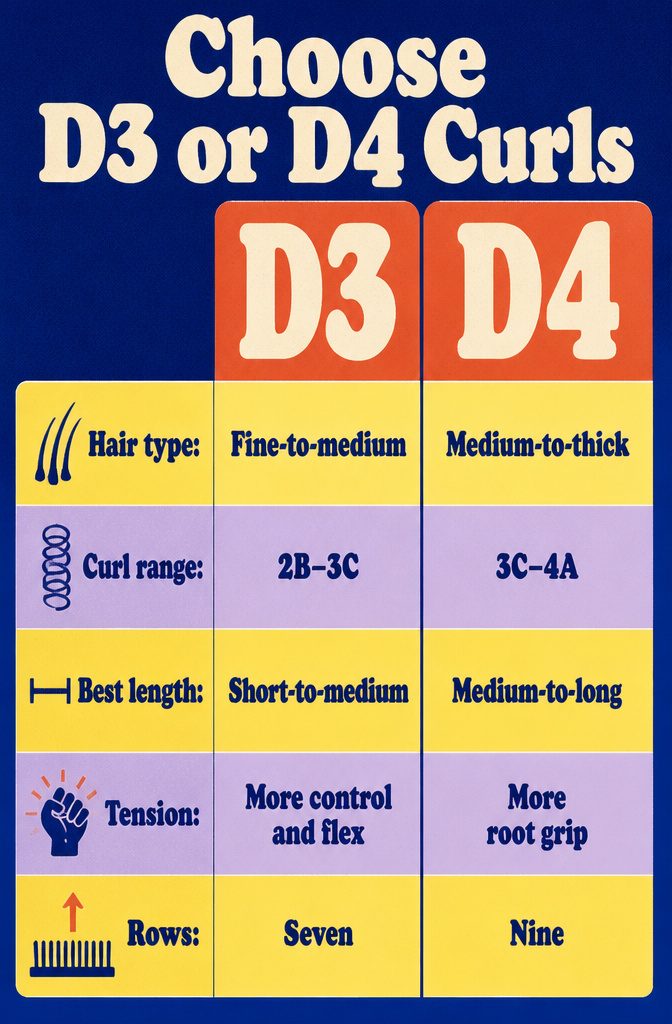
The D3 with seven rows suits fine-to-medium hair and curls in the 2B–3C range, while the D4 with nine rows is built for medium-to-thick hair and 3C–4A curls that need more tension to smooth and clump.
The D3 works well on short-to-medium lengths, the D4 on medium-to-long. Both define curls, but the row count changes how much pull the brush applies: more rows mean tighter spacing, a firmer pad, and more grip through each pass.
If you land between the two, the D4 wins for dense hair or tighter coils that benefit from extra tension at the root.
The D3 gives you more control and flex, which matters when you want definition without over-pulling looser waves.
One practical backup: you can remove rows from either brush if it drags too much, so a D4 bought too firm can be dialed back.
The difference is real but not catastrophic; I would rather have the right row count from the start than adjust it later.
Why the Denman Defines Curls Instead of Only Detangling
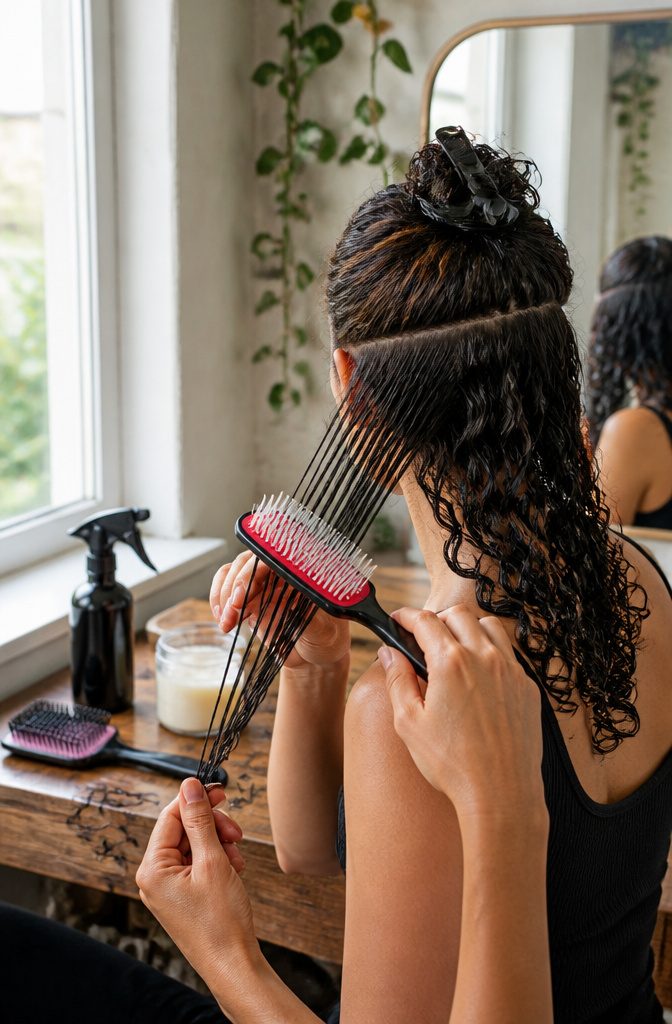
The Denman earns its place by creating light tension as it pulls through wet, product-coated hair. That tension pushes strands to group into clumps instead of splitting into frizz, so the brush shapes curls as much as it clears knots.
It also spreads leave-in and curl cream evenly through each section, which is why video walkthroughs brush before they do any shaping.
Pick the model by job. The D3 and D4 are the styling brushes.
The D83 is the detangler, better for working out knots than for forming spirals. If definition is the goal, I’d buy a D3 or D4 and skip the D83.
Frequently Asked Questions
What is a Denman brush?
A Denman brush is a styling tool built to define and clump curls by creating controlled tension as it moves through wet, product-coated hair.
Different models vary in row count and bristle spacing to suit different curl types, with the D3 and D4 handling styling work while the D83 focuses on detangling.
The brand has been a salon standard since the 1950s and now sits in curly-hair routines everywhere.
How do you use a Denman brush on curly hair?
Start with soaking-wet hair and apply leave-in conditioner and curl cream for slip, then divide hair into 3 or 4 horizontal sections.
Brush each section slowly downward with steady tension from root to tip, then scrunch upward before moving to the next. Let the hair dry without touching it to keep the curl clumps intact.
Should I get the Denman D3 or D4?
The D3 with 7 rows suits fine-to-medium hair and curls in the 2B–3C range, while the D4 with 9 rows is built for medium-to-thick hair and 3C–4A curls that need more tension.
If you land between the two, the D4 wins for dense hair or tighter coils that benefit from extra pull at the root. The D3 gives more control and flex, which matters when you want definition without over-pulling looser waves.
What does a Denman brush do for curly hair?
The Denman creates light tension as it pulls through wet, product-coated hair, which pushes strands to group into clumps instead of splitting into frizz.
It shapes curls as much as it clears knots and spreads leave-in and curl cream evenly through each section.
Is the Denman brush better than a Wet Brush?
The Denman is better for defining curls, while the Wet Brush handles gentle detangling. The Wet Brush glides through hair with minimal resistance, which is good for fragile or damaged strands but does nothing to clump or shape curls.
Which Denman brush is best for frizzy hair?
The D3 or D4 work best for frizzy hair, chosen by texture and density. Use either on wet, product-loaded hair rather than dry, and follow with a diffuser or air-dry to lock in the definition the brush created.
How do I clean a Denman brush?
Remove the rubber pad, rinse it with warm water and shampoo, and scrub the bristles with a toothbrush if buildup remains. The pad dries quickly and stays cleaner longer than most other brushes.